
The Log Stool-Table Project
By Leonard Oliver Nasman, copyright 2005
An account of modifying old tree logs into stool/tables.
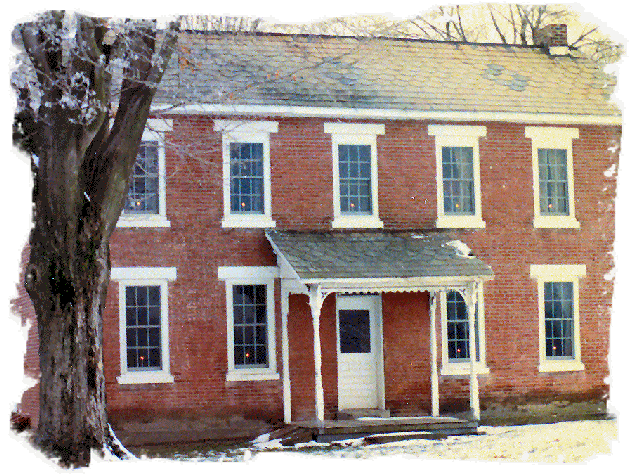
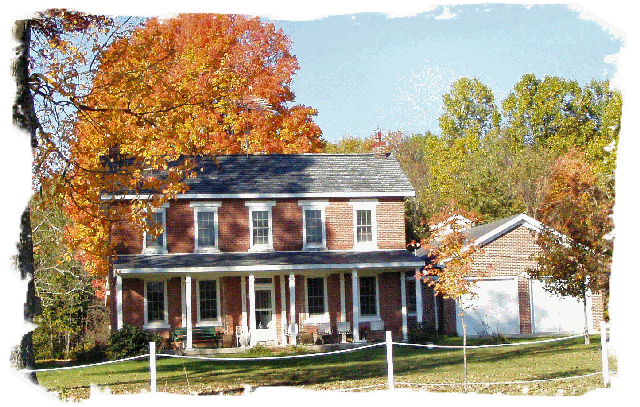
The Woodhaven House - 1988
Introduction
Many years ago, there was a wonderful large old maple tree close to the front of the house and a large (not quite as old) ash tree in the back yard. There were two problems with these trees. The tree in the front was hollow and extended over the house in a dangerous way. The ash tree in the back yard was too near the site of the future garage.
So, a tree service was engaged to remove these trees. The small branches were run through a high powered chipper and turned into mulch. Several big piles of these wood chips were stored in the meadow, and have been used to enhance various gardens and plantings. The larger pieces of wood were given to a neighbor who burns wood to heat his house.
I had the man from the tree service cut several pieces of ash and maple and I stored them on the front porch with the idea of using them in some future projects
The Project
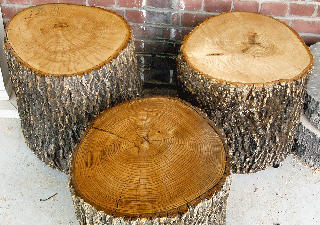
After a number of years, I finally got around to turning three big ash logs into combination stool/tables. The major challenge was to level and smooth the ends of the logs.
The top and bottoms of the logs were fairly rough chain-saw cuts and were not cut exactly perpendicular to the vertical axis of the logs.
To level and smooth the ends of the logs, I first constructed a fixture from some old pieces of steel that I rescued from a dumpster at Ohio State University. These pieces of steel once formed the framework for teaching islands in the Engineering Graphics Department. They probably date back to the 1950’s and consist of C and H shaped channels. Special spring-backed nuts are used to connect custom angle pieces. By cutting the rails to appropriate lengths, I built a fixture that would fit around a log.
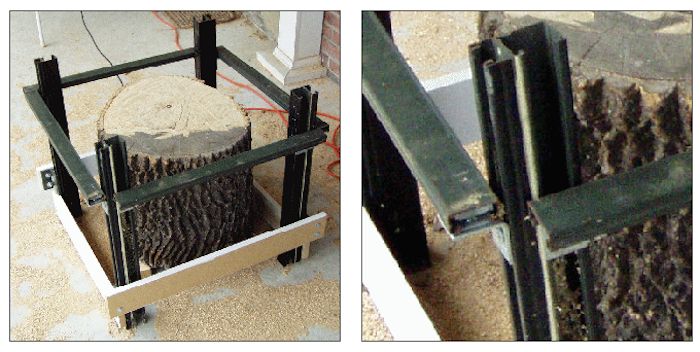
The top rails of the fixture are connected to the vertical legs with angles attached by screws. This allows the top horizontal rails to be adjusted to different heights.
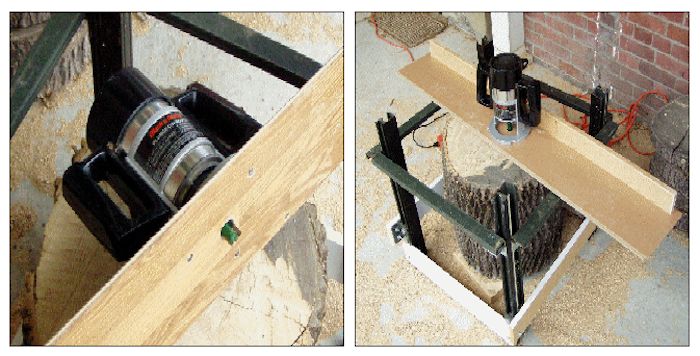
The next step was to replace my router base with a piece of left-over laminate flooring. This allows the router to slide back and forth across the top fixture rails and to mill the top of the log smooth. Because the weight of the router caused the piece of flooring to flex, I added a rib as a stiffener.
I installed a 3/4 inch bit in the router, adjusted it for about an 1/8 inch depth of cut, and started smoothng the end of a log. Because some logs were originally cut at an angle, I put a wedge under one side of the log to straighten it a little and flattened the bottom of the log. Then, I turned the log over and started working on the top.
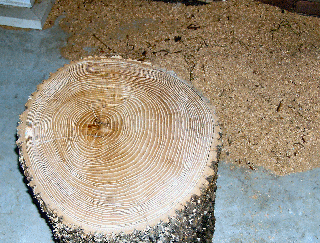
Since in some cases I had to remove more than an inch of wood, this process took quite a bit of time. It also created quite a pile of wood chips. Since I am usually at Woodhaven only on weekends, several weekends passed by before I was ready for the next step, sanding. A 3 inch belt sander smoothed the top of the log and started to reveal interesting grain patterns. Once the belt sander had removed all of the small grooves left by the router, an orbital sander with a finer grit sandpaper was used to complete the sanding.
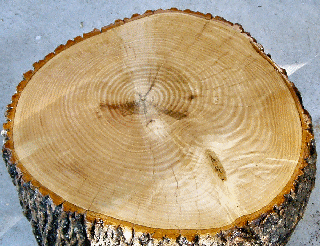
The bottoms of the logs and the bark sides were sprayed with a coat of polyurethane finish. My hope is that this will help preserve the bark. (Actually, the logs have been seasoning on the front porch for more than five years, and the bark has held tight. One of the logs had a few insect holes, and there were a few cracks and checks in the end grain.)
Next, wood filler was used in the larger cracks. Several coats of exterior grade polyurethane was applied. Some of the cracks caused valleys in the surface as the varnish soaked into the wood. Repeated sanding followed by additional coats of varnish eventually resulted in a smooth glossy finish. On one of the three logs, I applied a coat of walnut stain before varnishing just to see the difference it made in showing the grain.
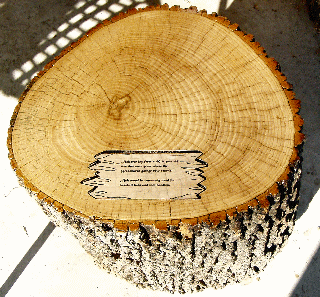
Some of the end grain shows very interesting patterns where the main tree trunk had enclosed smaller branches. Because the logs weighed nearly 100 pounds each, casters were added to make them easier to move around. On one of the logs, I printed a descriptive note from the computer and then attached it to the top of the log by painting it over with coats of varnish.
(The note reads: Ash log from a 40+ year old tree that once grew where the Woodhaven garage now stands. Ash wood is commonly used for baseball bats and tool handles.)
The finished logs can be used either as seats or as snack tables, and make a nice addition to the Woodhaven house front porch furniture.
