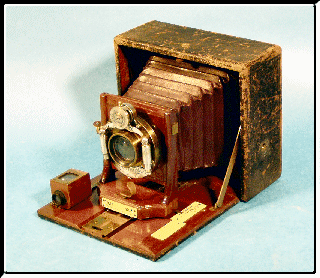
The Cycle Poco Camera
by Leonard Oliver Nasman
copyright 2004, all rights reserved
Introduction
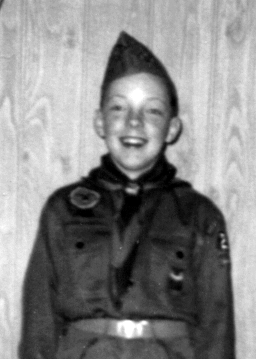 Back in the 1950’s, when I was a kid in Kane, PA, Mr. Lundgren died.
Mr. Lundgren ran a photography studio in Kane for as long as most folks could remember.
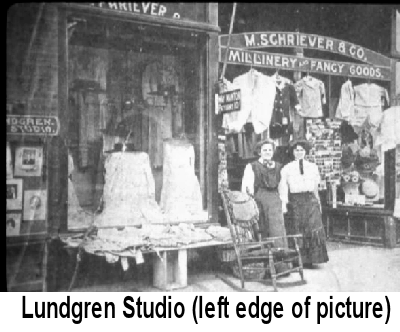
My dad (Oliver Nasman) went to help Mr. Lundgren's son (who was from out-of-town) clean up the studio. Most of the stuff was hauled out to the town dump, but my dad rescued a couple of things.
One thing was a big cardboard box full of glass negatives. This was brought to Tabor Lutheran Church where my mother (Astrid) was acting as church librarian at the time. I remember sitting in the small room that served as the church library in those days pawing through the plates. One memorable set of negatives showed Dr. Kane removing his own appendix (with the help of a nurse who held a mirror in just the right place). Apparently, Dr. Kane was trying to prove the effectiveness of modern local anesthetics (or maybe he just didn't trust any of the local doctors).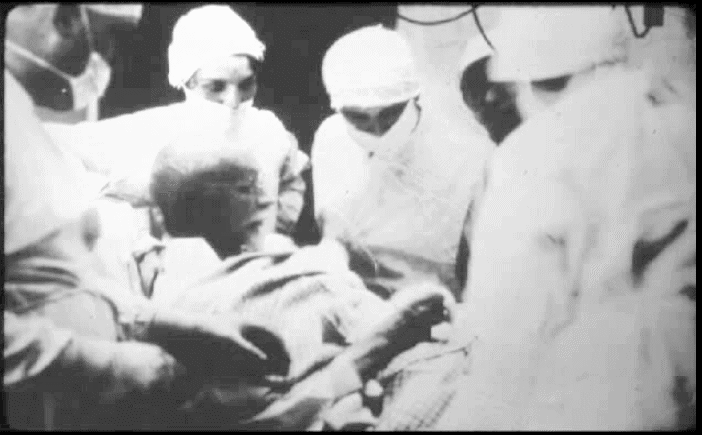
My dad also rescued a 4 by 5 Cycle Poco camera, which he brought home for me to play with. He mentioned that a bunch of larger format old cameras were simply dumped in the landfill.
A few years ago, while visiting the church, I mentioned the old negatives to the current secretary. She said no one could remember where those negatives had come from. Sometime later, I donated my old checkerboard house to the Holgate Toy Museum. Both my parents worked at the Holgate factory at one time or another. The factory was moved south (for cheap non-union labor) in the 1950's.
The Holgate Toy Museum was once in the old Olympic Luggage factory building. My folks bought me an Olympic Luggage suitcase when I graduated from High School, and I am still using it more than 40 years later. While visiting the Toy Museum, I learned that the box of old Lundgren negatives was moved to the old Train Depot that now serves as a local historical museum.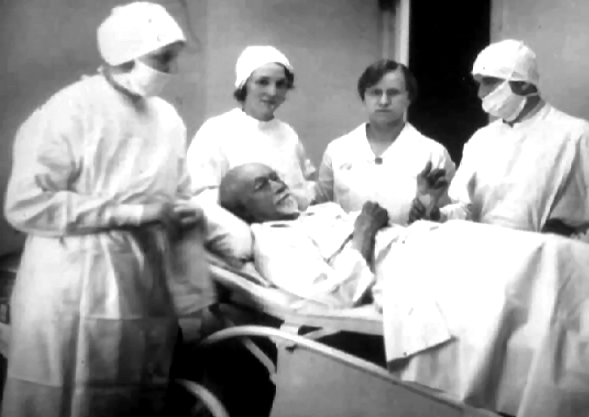
I offered to donate the Lundgren camera for display at the museum. Since the size of the camera is right, it might even be the very one used to take pictures of the famous Dr. Kane operation. I decided to make a sign for display with the camera. But, I cannot seem to do anything simply. So I also decided to write a little bit about how the old camera was used. I doubt that there are many folks who still know about this stuff.
Using The Cycle Poco Camera
The Cycle Poco No 3 camera was made by the Rochester Camera Company (the predecessor of Kodak) in the late 1800’s. It was typical of cameras that used glass negatives and a ground glass viewing screen. Here is how to use this type of camera.
Mount the camera on a tripod
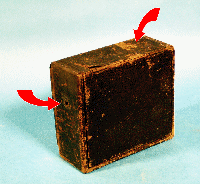 Use the 1/4-20 threaded hole on the bottom of the case. (Note that this standard tripod mounting screw thread size has been in use for over a hundred years and can still be found on most film and digital cameras and video camcorders.) Observe that there are two different tripod mounting threads, one on the bottom and another on the side of the case. This allows the camera to be set for either portrait or landscape mode.
Unfold the lens base
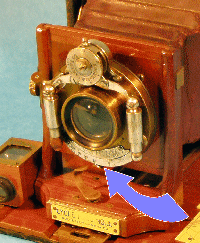
 Push the release button concealed under the leather cover on the top of the case. Use the lens base lever to release the lens mount and then slowly slide the lens base onto the lens platform, gently extending the bellows.
Adjust the rough focus
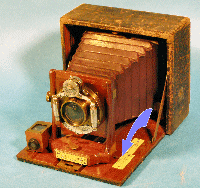 Use the focal distance guide to set the initial lens position and turn the lens base lever to lock the lens in place.
Frame the view
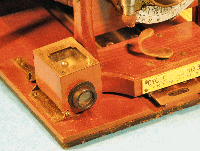
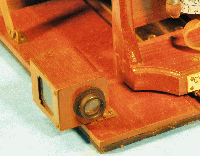
Use the viewfinder found on the lens base. Observe that there is a small ball in the viewfinder that is used to level the camera. Also note that the viewfinder can be rotated to change the format between landscape and portrait modes. (Landscape mode provides for compositions that are wider than they are tall while portrait mode provides for compositions that are taller than they are wide. The terms landscape and portrait were first used in painting, then photography, and have been adopted for use in computer graphics.)
Adjust the focus
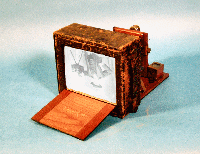 Open the focus door on the back of the camera to expose the frosted glass composition surface. The frosted glass allows for precise focus control, however the image is dim and may require the head of the photographer and the camera back to be covered with a black cloth in order to see the image on the frosted glass. (The lens should be adjusted to the smallest f-stop number to allow the maximum light through the lens for focusing.) Set the shutter control to the T position open the lens. After the image is focused, close the lens and focus door before inserting the film holder.
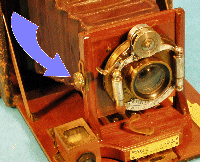 The lens position on the Cycle Poco camera can be adjusted vertically by loosing the small thumb screw on the side of the lens mounting board. This adjustment is used to control vertical perspective when photographing tall narrow buildings or objects.
Insert the film holder
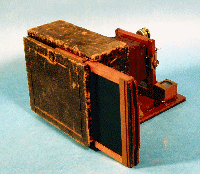 (The film holder must be pre-loaded with a prepared glass negative. This is done by applying a photo sensitive chemical mixture to the glass in the darkroom.)
When ready to make an exposure, remove the black negative cover from the film holder. (Note that some film holders, like the one shown, are double sided and can hold two different negatives. Be sure to remove the negative cover on the side toward the lens.)
Determine the exposure requirements
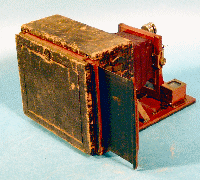 The exposure is controlled by a combination of shutter speed and f-stop. Fast shutter speeds let less light on the negative. The larger the f-stop number, the smaller the iris opening in the lens and the less light falls on the negative. A proper balance between shutter speed and f-stop is required to get the proper amount of light for a good exposure.
Slow shutter speeds can caused blurry pictures since the subject may move during the exposure. Fast shutter speeds require small f-stops (larger lens openings) to let in more light. The problem is that large lens openings cause less depth of field. (Depth of field is the distance between the closest and farthest objects that are in focus.) The photographer must compromise between stopping motion and maximizing focus by selecting the best combination of shutter speed and f-stop.
Set the shutter speed
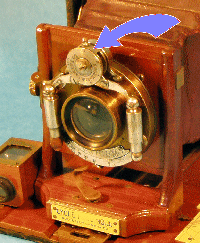 The Cycle Poco has an automatic shutter. The shutter speed is adjusted by moving a selection lever, and the speed was controlled by the action of the pistons on either side of the lens. (Note that earlier cameras did not have automatic shutters. Exposures were made by removing a lens cap for the desired amount of time, and then replacing the lens cap to end the exposure. )
Photographers had to develop skill in accurately keeping time. They had to be a human stop watch. Many photographers would count seconds by reciting "one thousand one, one thousand two, one thousand three" etc. to count off seconds. Except in the case where bright sunlight was available, or when magnesium flash powder was used, exposure times were long. (Consider that by the year 2000 most cameras had shutter speeds to 1/1000 of a second, ten times faster than the Cycle Poco.)
The Cycle Poco has the following shutter speeds: 1, 1/2, 1/5, 1/25, and 1/100 seconds. Two additional shutter positions on the Cycle Poco are T and B. T stands for time. The shutter release is clicked once to open the shutter, and a second time to close it. The B position stands for bulb. A rubber tube was connected to the shutter mechanism. The other end of the tube had a rubber squeeze ball, or bulb. When the ball was squeezed, the shutter was opened and stayed open until the ball was released.
Adjust the f-stop
 The f-stop is adjusted by rotating the lens barrel. The f-stop adjusts the iris opening to control the amount of light that reaches the negative.
Take the picture
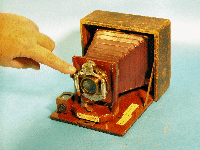 During portrait photography, the subject had to hold very still during the exposure when slow shutter speeds were in use. (Early photosensitive chemicals required fairly long exposure times.) Some photography studios had chairs with built-in head braces to help customers keep their head motionless during the exposure. The requirement that the subject had to "freeze" or remain motionless during the exposure explains why many early photos show people with stiff or strained expressions. Some folks think that their ancestors must have been stern or unhappy people when actually they were just keeping a frozen expression for the camera.
Replace the negative cover slide into the film holder.
If a double sided negative holder is being used, the holder is removed, turned around, and the process is repeated for the second negative.
Process the negative.
In the dark room, remove the glass negative from the holder. Place it in the developing chemicals for the required amount of time. Transfer the negative to a stop bath and then to the fixer chemicals for the required amount of time. The lights can now be turned on. Wash the negative in clean water until all fixer has been removed.
Make contact prints
Contact prints are made by placing the negative (in the darkroom) directly on a piece of sensitized photo paper. The negative and photo paper are exposed to a bright light for a specified amount of time. The photo paper is then developed and fixed with a process similar to that used for developing the negative.
Observe that pictures made from the Cycle Poco were 4 inches by 5 inches (or smaller if they were trimmed). Enlargements were not common when the Cycle Poco camera was being sold. If you wanted a larger picture, you needed a larger format camera. The most common size cameras used in 1900 were 4x5, 8x10, and 16x20.
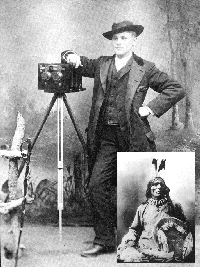
A photographer in 1900 had to be part chemist, part mechanic, and part artist. Most photographers specialized in studio work. Now days we think nothing of grabbing a camera and dragging it along on a trip. In the late 1800’s, Photographers who ventured out of the studio were undertaking a major effort. Here is a picture of John Andersson, a third cousin of mine who was born in Pennsylvania, but who lived much of his life near the Rosebud Sioux Indian reservation, and who created a remarkable collection of historically significant photographs. John Andersson used equipment in the late 1800’s very similar to the Lundgren camera.
The camera in the picture was operated in a manner similar to the Cycle Poco camera described here. If you look close, however, you will notice that the camera has two lenses. This type of camera was used to create two different images at the same time. These were spaced about the same distance apart as human eyes and when they were viewed together in a stereopticon, the viewer would see a 3D picture of the scene.
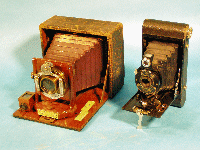
Photography was limited to professional photographers or skilled amateurs until negative film rolls for use in small format cameras became available as an option to glass negatives. Early roll film cameras contained many of the features of the earlier view cameras. Note the similarities between the Cycle Poco and the No 2 Folding Autographic Brownie.
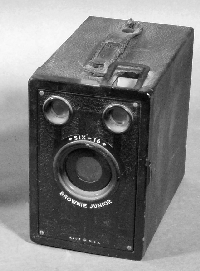
Cameras such as the Folding Autographic shown here still required the user to learn about shutter speeds and f-stops. However, when simple “point and click” box cameras such as the Brownie Junior arrived on the scene, everyone could create pictures for the family album.
